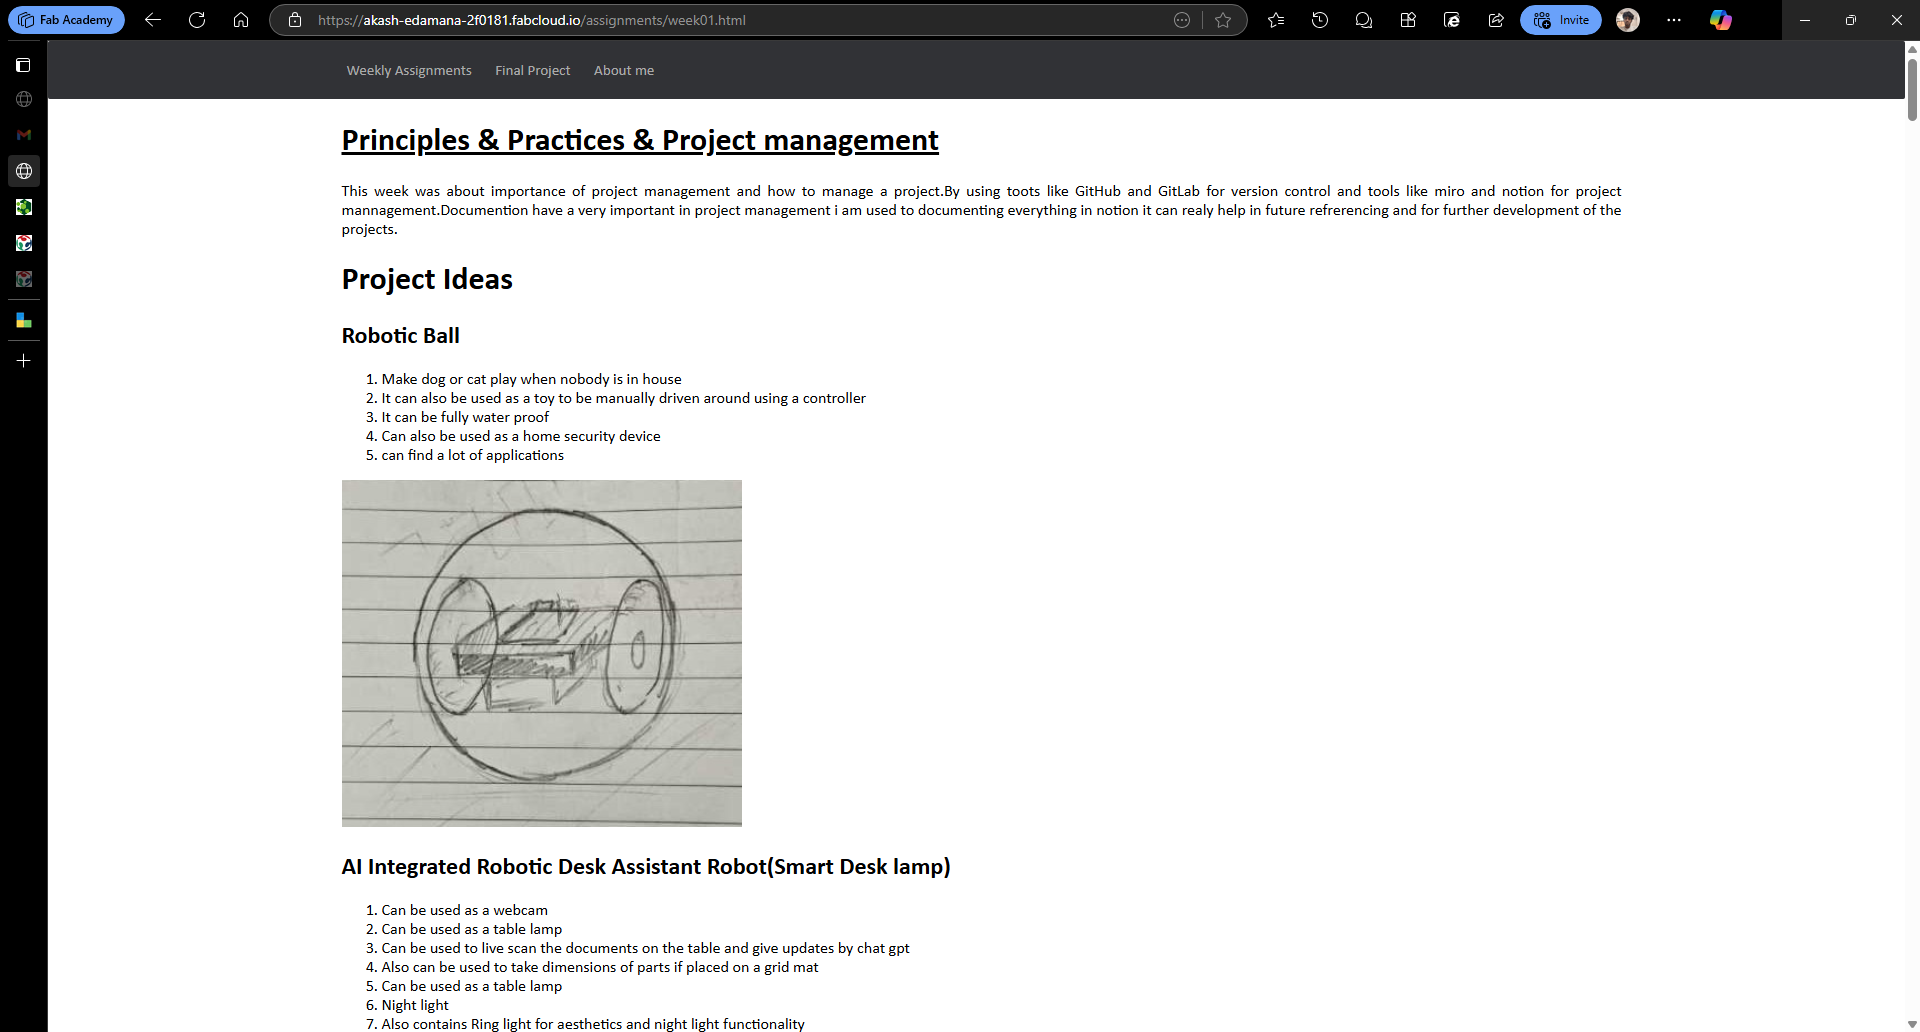
Principles & Practices & Project management
This week was about importance of project management and how to manage a project.By using toots like GitHub and GitLab for version control and tools like miro and notion for project mannagement.Documention have a very important in project management i am used to documenting everything in notion it can realy help in future refrerencing and for further development of the projects.
Project Ideas
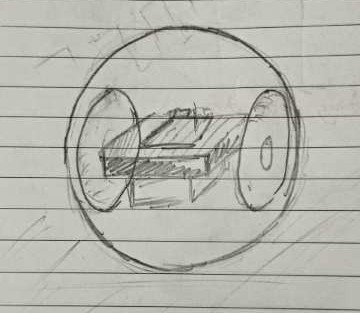
Robotic Ball
- Make dog or cat play when nobody is in house
- It can also be used as a toy to be manually driven around using a controller
- It can be fully water proof
- Can also be used as a home security device
- can find a lot of applications
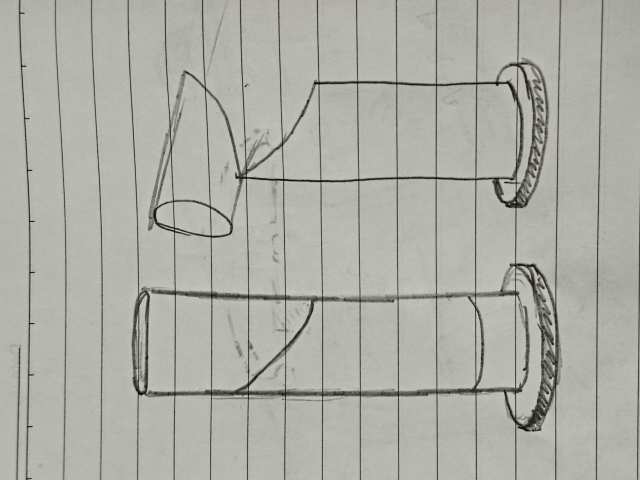
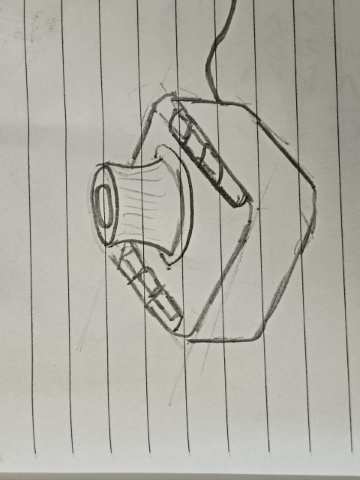
AI Integrated Robotic Desk Assistant Robot(Smart Desk lamp)
- Can be used as a webcam
- Can be used as a table lamp
- Can be used to live scan the documents on the table and give updates by chat gpt
- Also can be used to take dimensions of parts if placed on a grid mat
- Can be used as a table lamp
- Night light
- Also contains Ring light for aesthetics and night light functionality
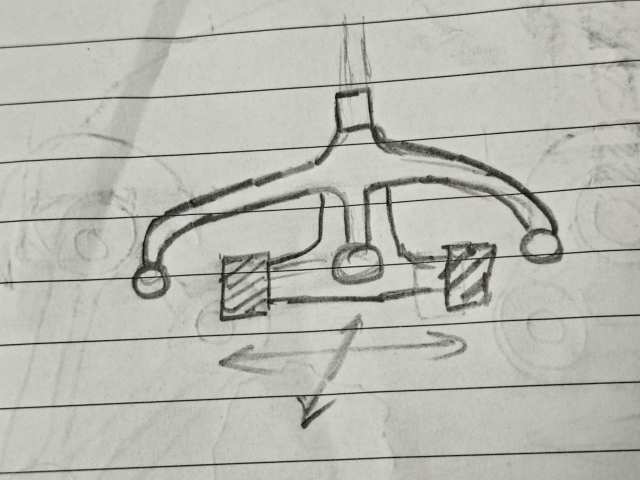
Chair Arranging Robot
- Office chare organizing machine
- Robot that has a base doc station where it comes back to charges
- Robot will go around and drive all chares to its designated positions
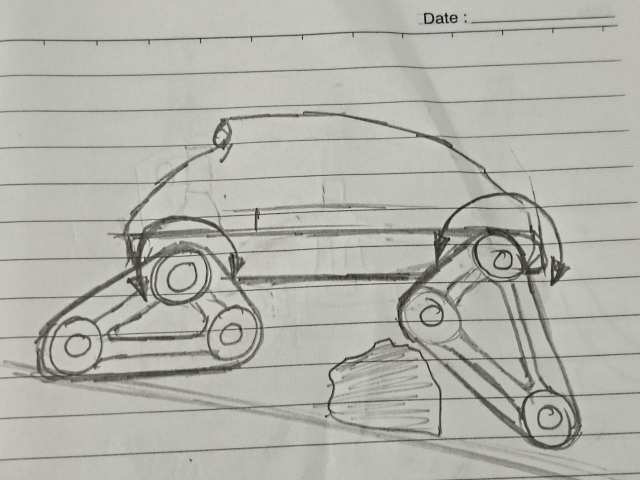
Multi Terrain Rover
- This is a rower that can be used for exploring multiple terrain
- To avoid obstacles rover will be able to adjust ground clearance
Task Manager
- To Show Todays Tasks
- tasks that are completed priority tasks etc..
- should connect with phone to show any important notifications
- Idea generate from app that generates wallpaper based on tasks
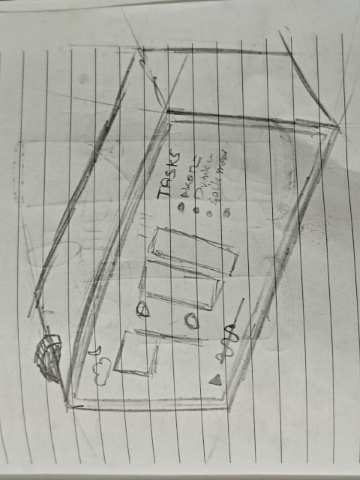
Space mouse
- This is a device used mainly in cad and 3D modeling software's
- The product available in market is too expensive
- This should be designed to the most comfortable position of my hand
Robot Arm
- An artificial arm controlled by pneumatics which simulate muscles/li>
- Made with
- Can be used to make a robot arm
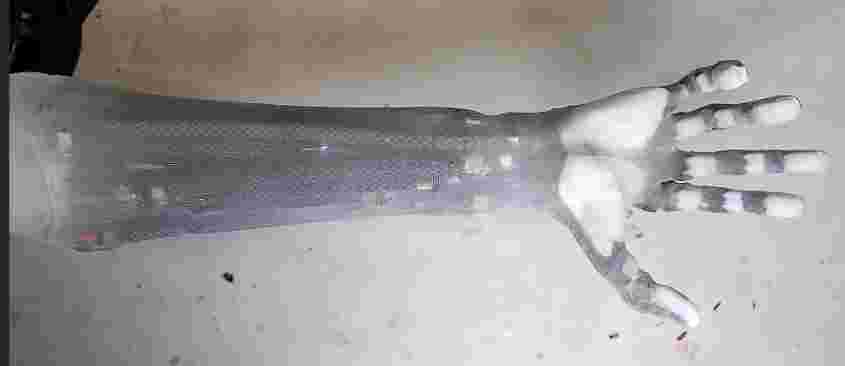
Image from : https://www.protolabs.com/en-gb/resources/blog/manufacturing-robotics-report-technology-and-project-survey/
VS Code
Visual Studio Code (VS Code) is a free, open-source code editor developed by Microsoft. It is lightweight, fast, and supports multiple programming languages, making it one of the most popular Integrated Development Environments (IDEs) for developers.
How to Install Visual Studio Code on Windows
1. Download VS Code
Go to the official website: https://code.visualstudio.com/
2. Installation Steps
For Windows
1. Download the Windows Installer from the website.
2. Open the downloaded file and follow the installation wizard.
3. Select the option to Add VS Code to PATH .
4. Click Install and wait for it to complete.
5. Open VS Code from the Start Menu.
3.VS Code Extensions Installation
Extensions in VS Code are plugins that add new features like:
- Support for different programming languages.
- Debugging tools and performance improvements.
- Features like Auto Save, Live Server etc.
1. How to Install Add-ins in VS Code
Follow these simple steps to install an extension:
- Open VS Code .
- Click on the Extensions icon
Ctrl + Shift + X
. - Search for the extension you want (e.g., Live Server).
- Click Installand wait for it to be added.
- Restart VS Code if needed.
2.Auto Save Extensions
Auto Save automatically saves your file whenever you make changes, without needing to press Ctrl + S.
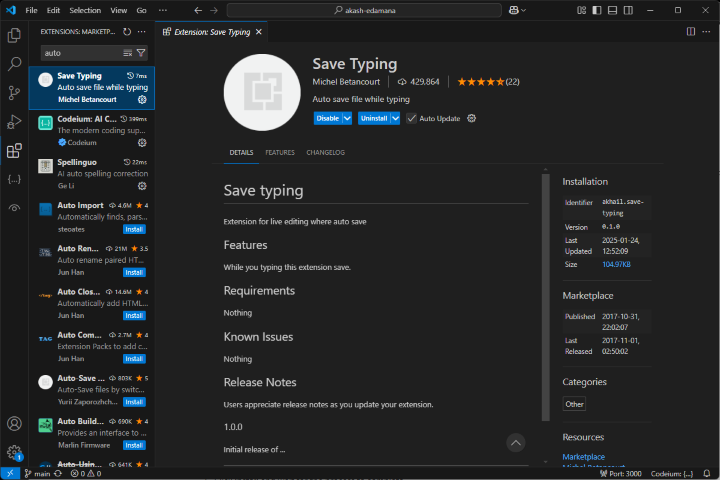
How to Enable Auto Save:
- Go to File > Preferences > Settings.
- Search for Auto Save.
- Enable it by selecting "afterDelay" or "onFocusChange".
3.Live Preview Extensions
Live Server allows you to see real-time updates of your HTML, CSS, and JavaScript files in a browser.
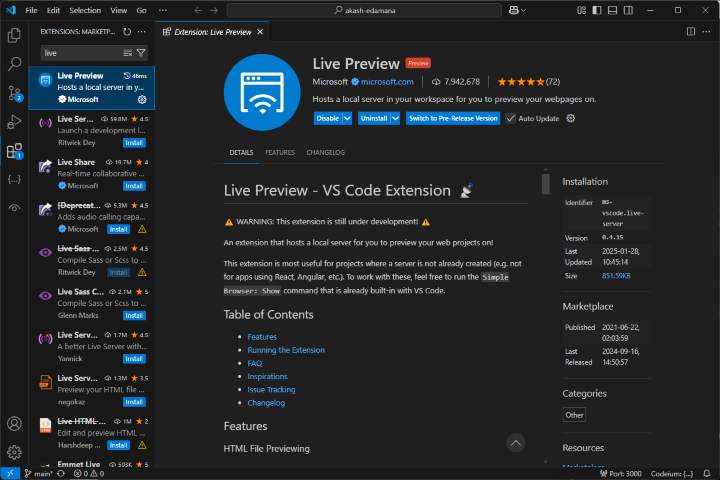
How to Install Live Server:
- Go to Extensions
Ctrl + Shift + X
. - Search for Live Extension.
- Click Install.
- Once installed, open your HTML file and click "Show Preview" at the top right corner.
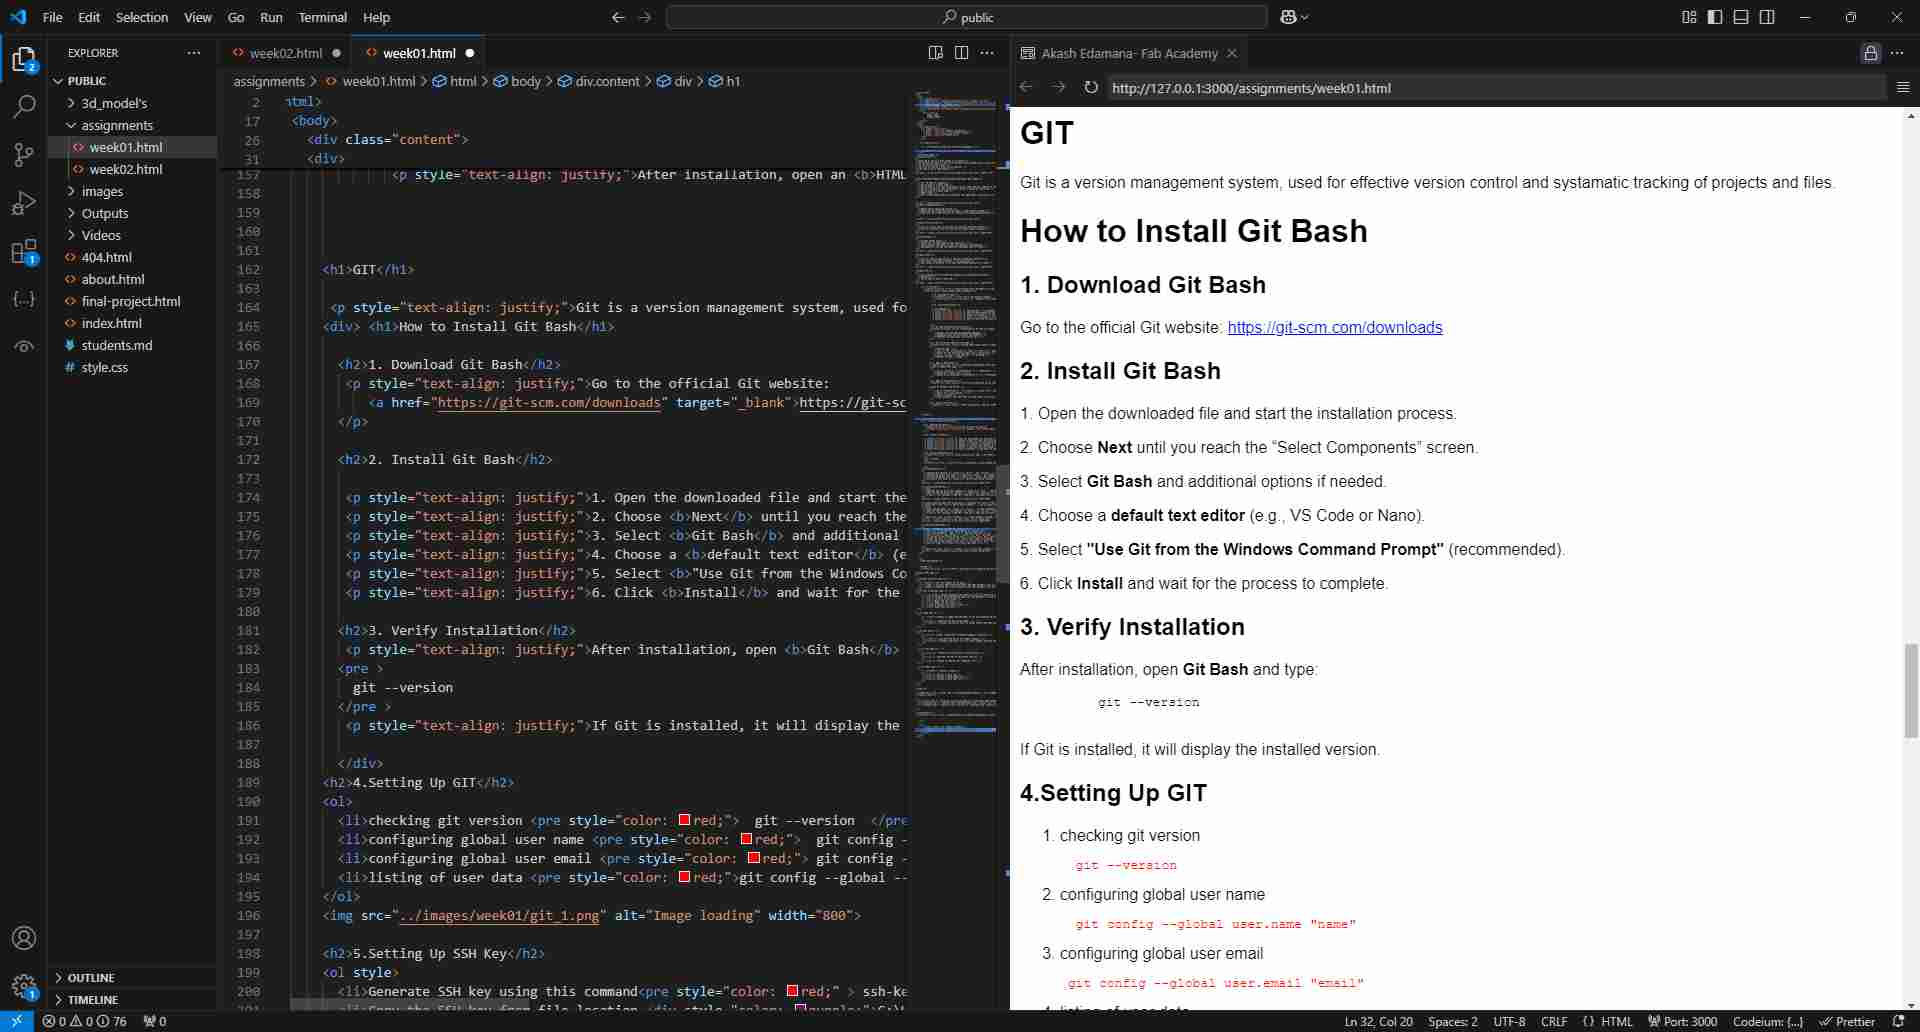
GIT
Git is a version management system, used for effective version control and systamatic tracking of projects and files.
How to Install Git Bash
1. Download Git Bash
Go to the official Git website: https://git-scm.com/downloads
2. Install Git Bash
1. Open the downloaded file and start the installation process.
2. Choose Next until you reach the “Select Components” screen.
3. Select Git Bash and additional options if needed.
4. Choose a default text editor (e.g., VS Code or Nano).
5. Select "Use Git from the Windows Command Prompt" (recommended).
6. Click Install and wait for the process to complete.
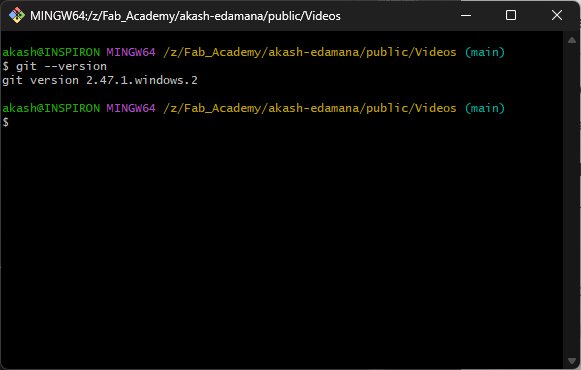
3. Verify Installation
After installation, open Git Bash and type:
git --version
If Git is installed, it will display the installed version.
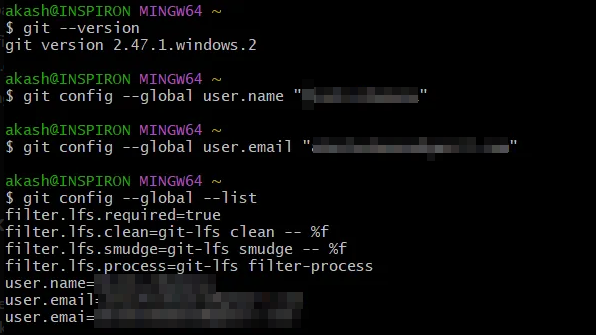
4.Setting Up GIT
- checking git version
git --version
- configuring global user name
git config --global user.name "name"
- configuring global user email
git config --global user.email "email"
- listing of user data
git config --global --list
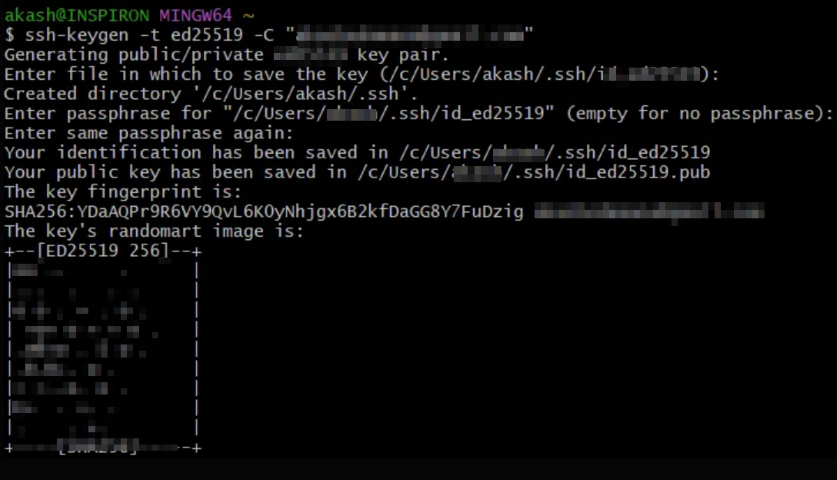
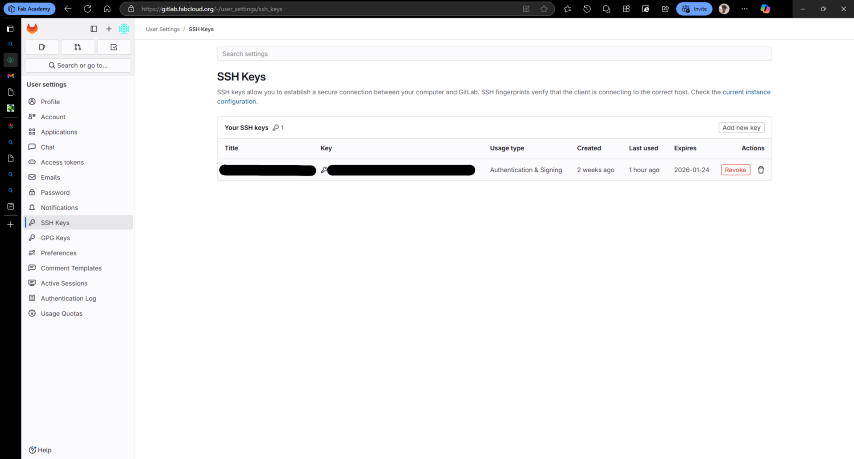
5.Setting Up SSH Key
- Generate SSH key using this command
ssh-keygen -t ed25519 -C "email"
- Copy the SSH key from file location C:\Users\....\.ssh
- In git >> user settings >> SSH key >> add new >> then past the user key there
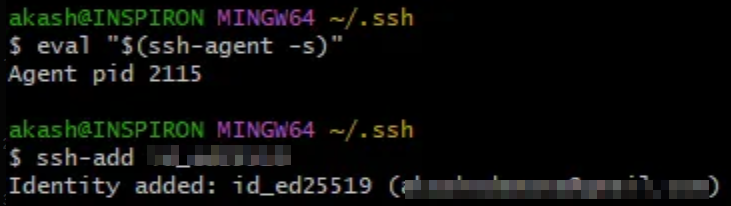
6.Adding SSH key agent for saving key in a separate file like in a USB drive
Go to file C:\Users\....\.ssh >> right click >> Open git bash here
- start ssh key agent
ssh-add id_ed25519
- Copy the SSH key from file location C:\Users\....\.ssh
- In git >> user settings >> SSH key >> add new >> then past the user key there
Note: After typing “ ssh-add “ Press tab to get the id_####
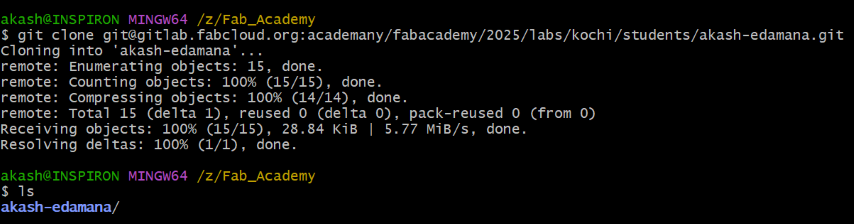
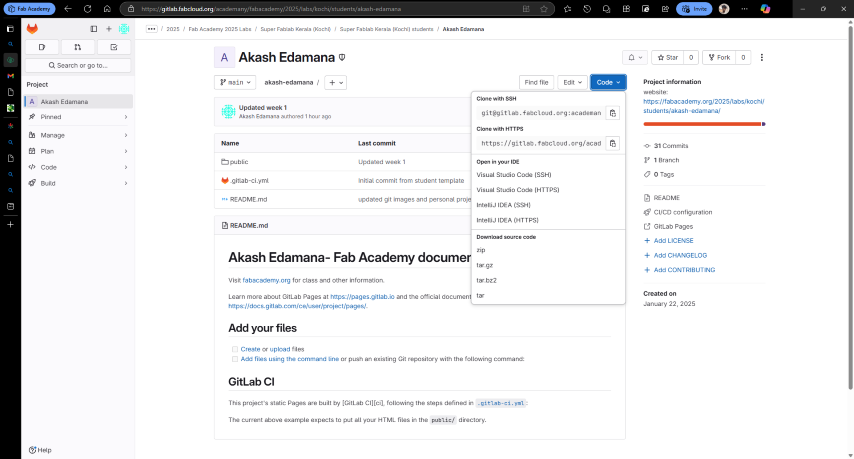
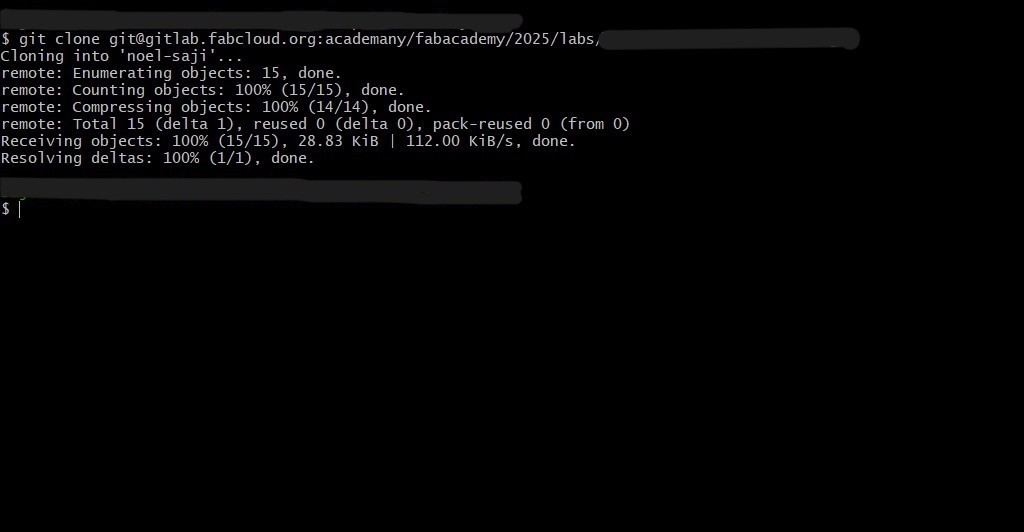
7.Cloning repository
- Copy the Repository URL
- Open Your Terminal or Command Prompt and Use the git clone Command
Committing Agreement
- Go to fabacademy.org/2025/doc/students.md
- Save as >> to created file “Fab_Academy” as “students.md”
- File “Fab_Academy”>> right click >> Open git bash here >>
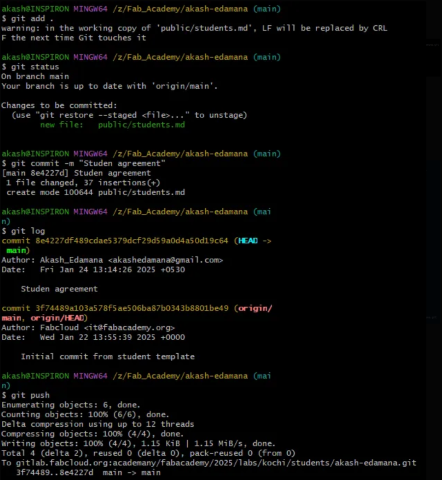
- add the files to temp storage
git add .
- to see the current status of the file
git status
- commit the files
git commit -m "message"
- to see the current status of the file
git status
- push the files
git push
Note: In "git add" in place “. “ if you give a specific file name only that file will be added to the temp storage
Web Development
HTML
HTML is the skelton of an website and CSS is the style of the website, It is very important to have a good understanding of HTML and CSS for creating a practical and aesthetic website.
Basic HTML Tags
Core Structure Tags
- html:The root element of the page.
- head:Contains meta-information about the HTML document, such as the title, stylesheets, and scripts.
- body:Contains the visible content of the HTML document, such as headings, paragraphs, images, and links.
Text Formatting Tags
- h1 to h6:Define headings with different levels of importance.
- p:Contains meta-information about the HTML document, such as the title, stylesheets, and scripts.
- br:Inserts a line break.
- b:Makes the text bold.
- i:Makes the text italic.
- span:Defines a section of text.
- u:Underlines the text.
Image Tag
- img:Inserts an image into the page. It has two essential attributes
- src: Specifies the URL of the image.
- alt: Provides alternative text for screen readers and when the image fails to load.
Link Tag
- a: Creates a hyperlink to another webpage or resource.
- href: Specifies the URL of the target resource.
- alt: Provides alternative text for screen readers and when the image fails to load.
List Tags
- ul: Creates an unordered list (bulleted list).
- li: Specifies the URL of the target resource.
- ol: Creates an ordered list (numbered list).
Table Tags
- table: Defines a table
- tr: Defines a table row
- th: Defines a table header cell.
- td: Defines a table data cell.
CSS
CSS (Cascading Style Sheets) is a fundamental language used to style and control the visual
Types of CSS
- Inline CSS: Inline CSS is directly applied to individual HTML elements using the style attribute within the HTML tag.
- Internal CSS: Internal CSS is defined within the style tag, which is placed inside the head section of the HTML document.
- External CSS: External CSS is written in a separate file (usually with a .css extension) and linked to the HTML document using the link tag in the head section.
I made a webpage using HTML and CSS and pushed it to GitLab and i learned basic git commands and used the basic html tags and css
Conclusion
Completed the first weekly Assignments of Fab Academy,Made a webpage and updated "about me" page and "week 1" page one using HTML and CSS and pushed it to GitLab and also learned basic git commands